

Edit a Board
Access
Click the Board Designer icon in the top/right navigation.
Use
Expanding/Collapsing the Columns
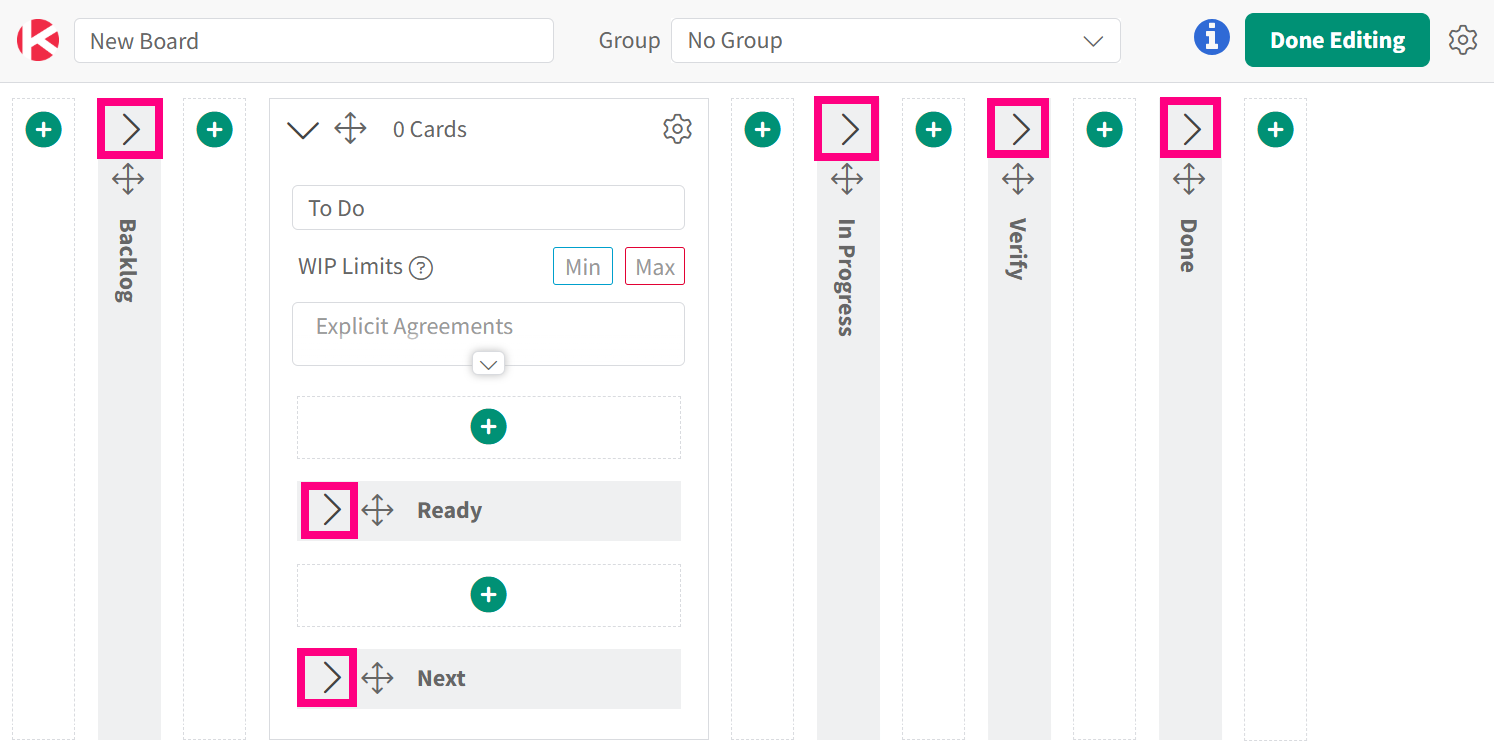
Once you enter the Board Designer, all your columns will expanded by default. You can collapse or expand each column by clicking on the chevron in each column.
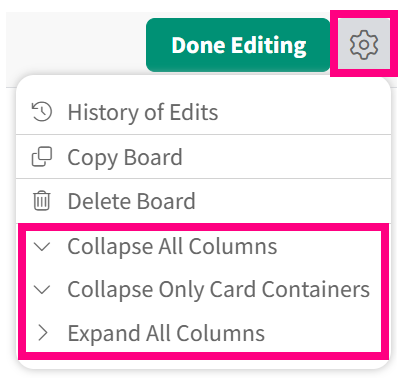
You can also go into the menu (the three dots) in the top right corner to expand or collapse all columns simultaneously. There are three options: ‘Collapse All Columns’, ‘Collapse Only Card Containers’, and ‘Expand All Columns’.
Working with collapsed columns will permit you to see more columns in the Board Designer so that you can focus only on the area of the board that you need to edit.
Please note that you can use that drag & drop icon (four arrows), which is situated next to the collapse chevron, to move columns around even if they are collapsed.
Navigation
Let’s start with the navigation in this window.

In the top left corner, next to the Kanban Zone logo, you can:
- edit the Title of the board
- assign this board to a specific group that you have predefined under your organization settings.
In the top right corner, there are:
We recommend new users to leverage our extensive list of board templates and start with a board that already has the basic foundation. Once you feel more comfortable, you can start a board from scratch.
Editing a Card Container
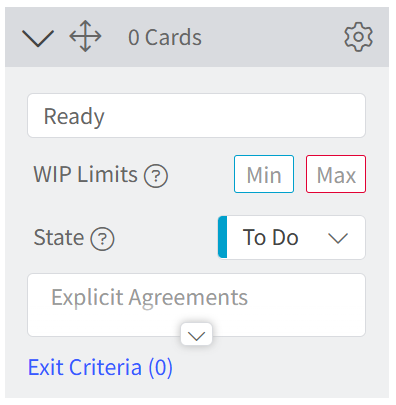
In the screenshot below, we have expanded a card container (grey column), so that we can explain all the functionalities associated with a card container.
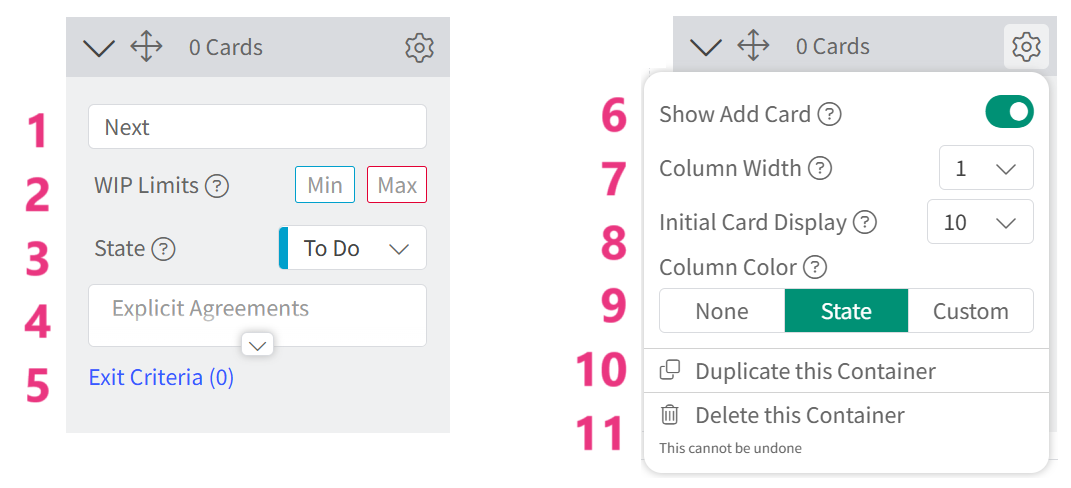
In each card container, you can perform the actions listed below directly from the container:
- The ability to Name the column.
- The ability to set minimum and maximum WIP Limits. Read more about WIP limits here.
- The ability to select a column State. Read more about state columns here.
- The ability to define Explicit Agreements. Read more about it here.
- The Exit Criteria are shown here but are editable under your board settings.More actions are available under the cog icon in the top/right.
- The ability to show/hide the Add Card.
- The ability to set the Column Width.
- The ability to see the number of Initial Card Display. Any card in that column above that number will be available to see with a single click. This feature is essential if you have a lot of cards on your board because it will help improve the performance when loading your board.
- The ability to set a Column Color. The default is None, but you can use our column State colors or define your Custom colors.
- The ability to Duplicate a container.
- The ability to Delete a container.
Adding new Card or Layout containers
Everywhere you can add a new container, you will always see a + (plus) drop area to add a new container.
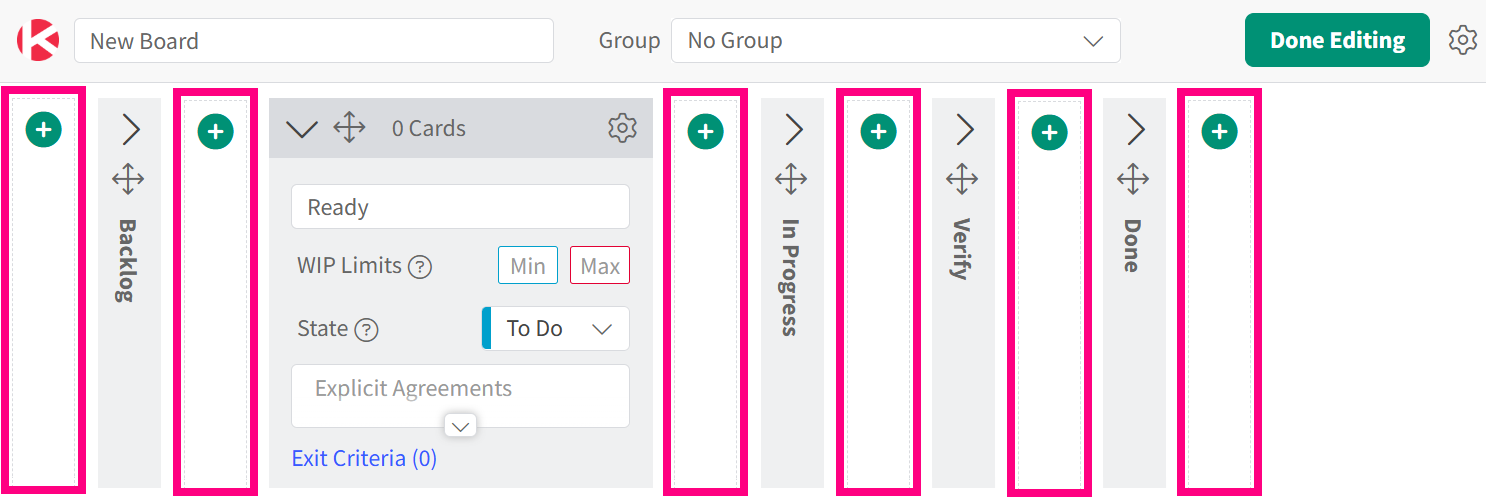
As shown in the screenshot below, once you click a + drop area, you will be shown the ability to add a Card Container or Layout Containers of type Horizontal or Vertical:
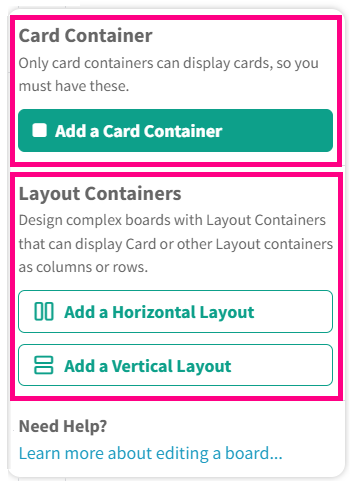
Card Container
- Add a Card Container – Only this type of container can hold cards, so you can build a board just by using this type of container. The other two types of containers (described below) are used to organize these Card containers to create the board layout that you need. Don’t forget that only this container can hold cards.
Layout Containers
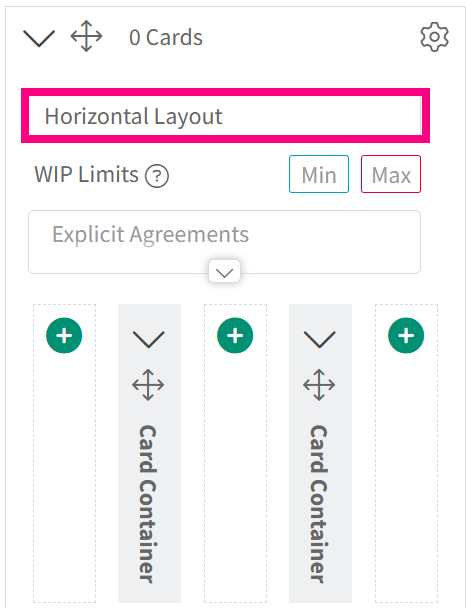
- Add a Horizontal Layout container – This container can’t hold cards. Instead, it’s used to contain other containers. The containers inside this container will be displayed in a series of vertical columns.
- Add a Vertical Layout container – This container can’t hold cards. Instead, it’s used to contain other containers. The containers inside this container will be displayed in a series of horizontal rows.
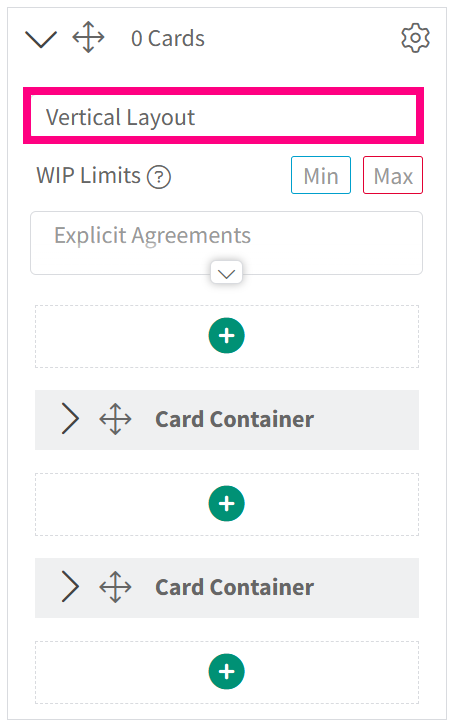
As shown in the image below, when you click the cog icon at the top/right of a Layout container that displays Horizontal or Vertical, you will see an option to “Switch to Horizontal” or “Switch to Vertical” depending on the type of container you have.
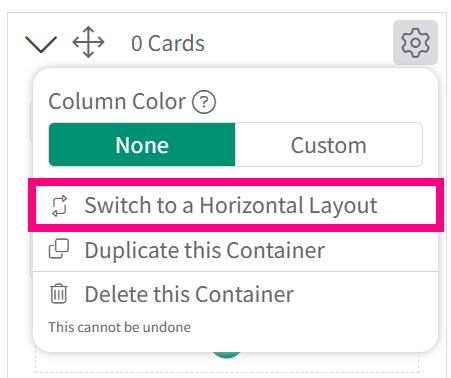
This option can be very helpful to consider different ways to visualize your board. It can also save you a lot of time by quickly seeing what the other way of organizing your containers may look like, without having to recreate all these containers.
Related Information:


