

Knowledge Base
Board Groups
In this article
A board group is a way to manage your boards into groups. First, you have to create the group, then, you can assign a board to the group you’ve made.
Adding a New Board Group
To create a new board group, make sure you are the administrator of the organization and you have the Professional plan.
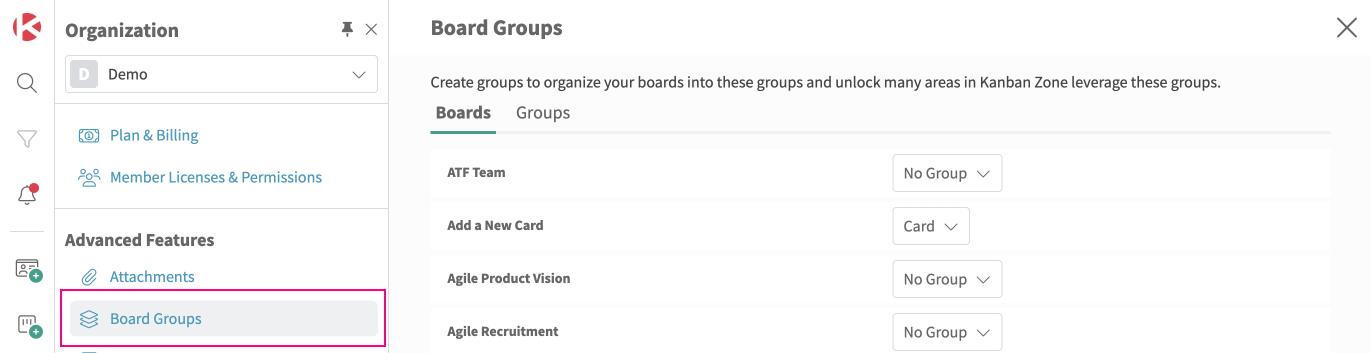
- Navigate to the Organization Settings by clicking your avatar in the top/right and then clicking Organization Settings from the menu.
- Choose ‘Board Groups’ from the left-side menu. You’ll see the list of boards (the default is the ‘Boards’ tab).

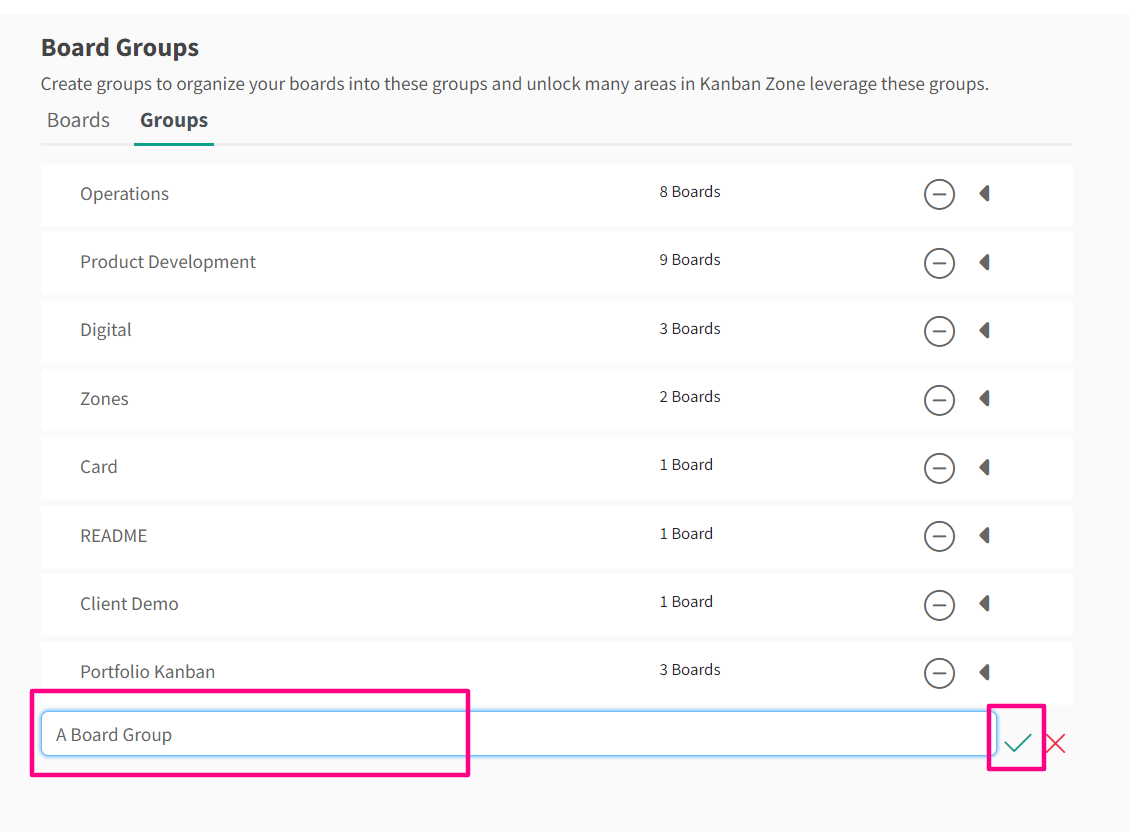
- Choose the ‘Groups’ tab. Here you’ll see a list of your board groups.
- Click ‘Add Group’, type in the name of your group, and click the check mark on the left side to save the group or hit Enter.

Editing a Board Group
Editing the Title
- Navigate to the Organization Settings by clicking your avatar in the top/right and then clicking Organization Settings from the menu.
- Choose ‘Board Groups’ from the left-side menu. You’ll see the list of boards (the default is the ‘Boards’ tab).

- Choose the ‘Groups’ tab. Here you’ll see a list of your board groups.
- Click on the title of the board group you want to edit. Make the changes, and then hit Enter or click on the check mark next to the textbox.
Assigning Boards to a Board Group
There are three ways to assign a board to a board group. The first one is from the Board Groups settings (which can only be done by the administrator of the organization).
- Navigate to the Organization Settings by clicking your avatar in the top/right and then clicking Organization Settings from the menu.
- Choose ‘Board Groups’ from the left-side menu. You’ll see the list of boards (the default is the ‘Boards’ tab).

- Next to your board, there is a dropdown menu of the boards that you have. Pick one from the dropdown menu to assign the board to that board group.


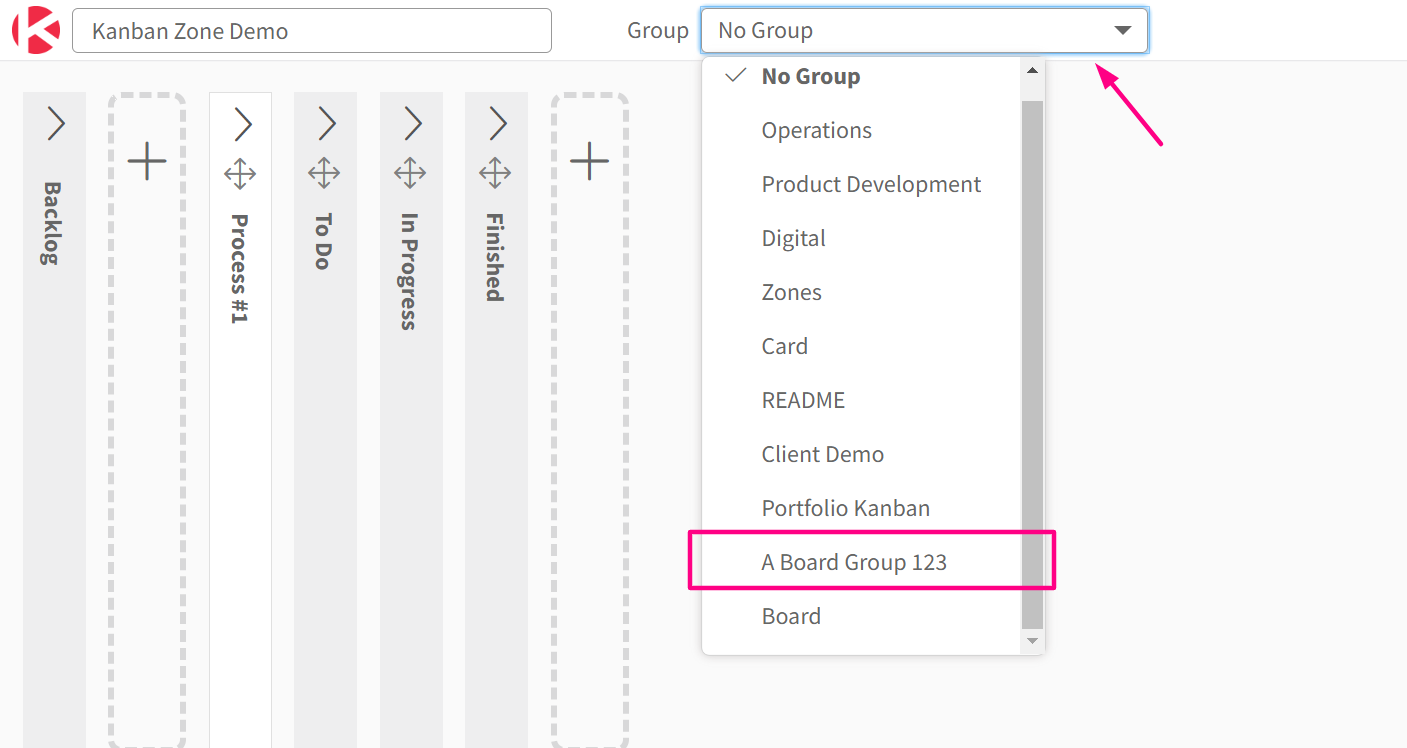
The second way to assign a board to a group member is through the Board Designer.
- Navigate to Board Designer in the top-right corner.

- At the top of the screen, pick the board group you want to assign the board to.

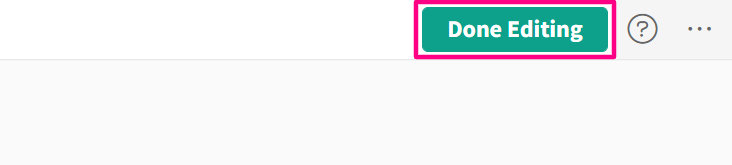
- Click ‘Done Editing’ in the top/right corner to save the changes.

To learn more about the Board Designer, visit Edit a Board.
The last one is when you add a new board. Find out how in this article.
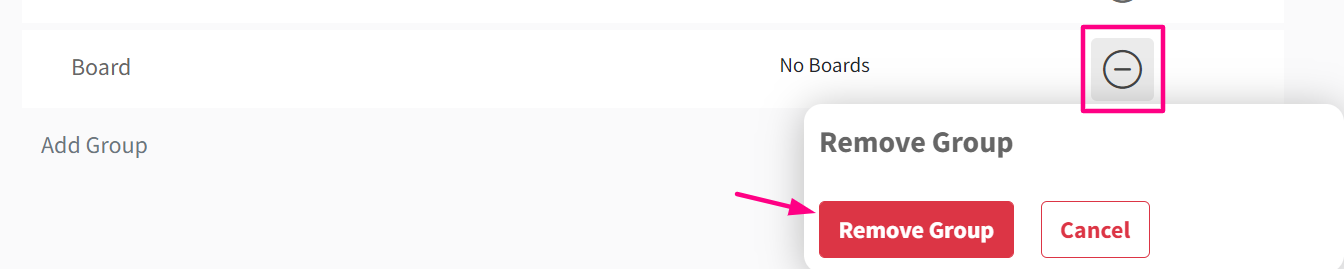
Removing a Board Group
- Navigate to the Organization Settings by clicking your avatar in the top/right and then clicking Organization Settings from the menu.
- Choose ‘Board Groups’ from the left-side menu. You’ll see the list of boards (the default is the ‘Boards’ tab).

- Choose the ‘Groups’ tab. Here you’ll see a list of your board groups.
- Click the ‘–’ icon next to your board group, then click the ‘Remove Group’ button to confirm.

- If there’s a board inside your group, you’ll see this option to reassign your boards. After you click the ‘–’ icon, choose the board group you want to reassign the boards to, then click the ‘Reassign Boards & Remove’ button.


Related Information:


