

Custom Fields
Access
Only the Organization Owner or licensed members with the Advanced Features permission can access this area. Learn more about managing members in your organization.
- From the left navigation, click on your Organization (icon at the bottom)
- This will open the Organization panel, click Custom Fields
Use
Add a new custom field
The first thing you have to do to have a custom field on your board is to add a new custom field for your organization. After that, you can start adding custom fields to your board.
1. Click the ‘Add Custom Field’ button.

2. Depending on your needs, select from the available custom field types.
-
- Date – track a date value
- Email – store an email address
- Members – select a specific member of the board
- Multi-Select – track a preset list of values and let users select a single or multiple values
- Number – track a number value with the option to set a symbol or format
- Phone – store a phone number
- Rating – select a rating using a vast list of emojis
- Signal – provides an indicator of the importance of a card
- Single-Select – select a single value from a preset list of your choosing
- Text – store a text value using a free text field
- Toggle – set a two-state value like on/off or yes/no
- URL – store a URL

3. When adding a new custom field of type Date, Email, Members, Phone, Text, Toggle, and URL, simply add ‘Custom Field Title’ and ‘Description’ then hit the ‘Save’ button.
")
4. When adding a new Number custom field type, you also get to set up the Number settings (add a symbol before or after a number, and add thousands separator or decide the decimal places). Click the Save button once you’re done.

5. When adding a new Multi-Select or Single-Select custom field type, you also need to add a list of ‘Choices’ to appear in the option. Press enter/return to add a new value in the Choices, then hit the ‘Save’ button when you’re done.
")
6. When adding a Rating custom field type, in addition to the Custom Field Title and Description, you will also have to define the Scale and the Symbol of the rating. Click the ‘Save’ button once you’re done.
")
Enable/Disable Custom Field
Once you have completed creating the custom fields at the organization level, an administrator will have to go to each board to enable or display custom fields on specific boards.
- Click the ‘Board Settings’ icon at the top right corner.
- On the board settings, go to the ‘Custom Fields’ section.

- Toggle the button on the left to enable the custom fields and check the box to show the custom fields on the board. Once enabled, the board members can fill in the custom fields with data.
Example
The Department custom field is active and shown on the board while the MVP custom field is active but not shown on the board.
")
When you view your card from the board with those set of custom fields, Department data will be visible but not the MVP data.
")
Only when you open the card, will you be able to see the ‘MVP’ custom field data.

New card on a board with custom fields enabled
Once the custom fields are enabled, new cards will automatically have the custom fields which board members can fill in with data.

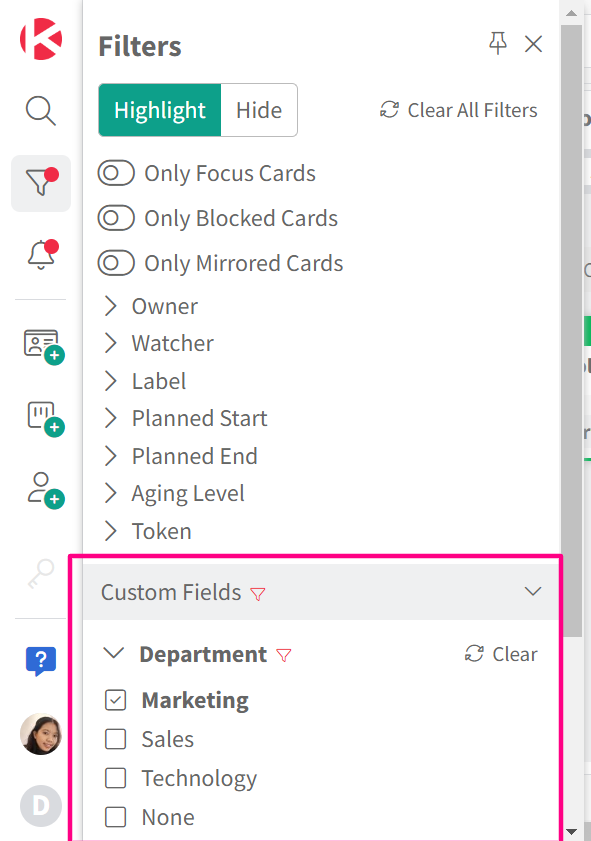
Filter your board with custom fields
- To filter your board using the custom fields, navigate to the ‘Filter’ icon on the left side of your screen.
- Expand the custom fields and enter the data that you want to filter. Each custom field type has different filter types.

- To learn more about filtering, see this article.
Custom Fields and Roles
Once a custom field has been created and assigned to a board, all members of the board can see the new custom field.
-
- Organization Owners can purchase/cancel the custom field add-on, as well as set up and manage all custom fields across the organization. Only the organization owner or a member with delegated permission to manage add-ons can create, edit or delete a custom field for the organization.
- Administrators can choose to “Enable on Board” a custom field so that it becomes available to all members of a specific board. They can also decide to “Show on Card on Board” so that the custom fields are visible on the board without opening a card.
- Collaborators can view and edit the value of a custom field.
- Subscribers can only view a custom field.
Related Articles:


